

Introduction
Did you know that the average store-bought deli meat contains up to 450mg of sodium per serving and often includes nitrates, preservatives, and artificial flavors? Shocking, right? Many health-conscious individuals are now questioning what’s really in those convenient pre-packaged slices. If you’ve ever wondered about making homemade deli meat but thought it might be too complicated, you’re in for a delightful surprise. Not only is creating your own deli meat surprisingly simple, but it also allows complete control over ingredients, flavor, and nutritional content.
Today, I’m sharing my favorite recipes for creating delicious, preservative-free lunch meats right in your kitchen. These recipes will transform your sandwich game while providing healthier alternatives to commercial options. Let’s dive into the wonderful world of homemade deli meats!
Table of Contents
Ingredients List For The Homemade Deli Meat

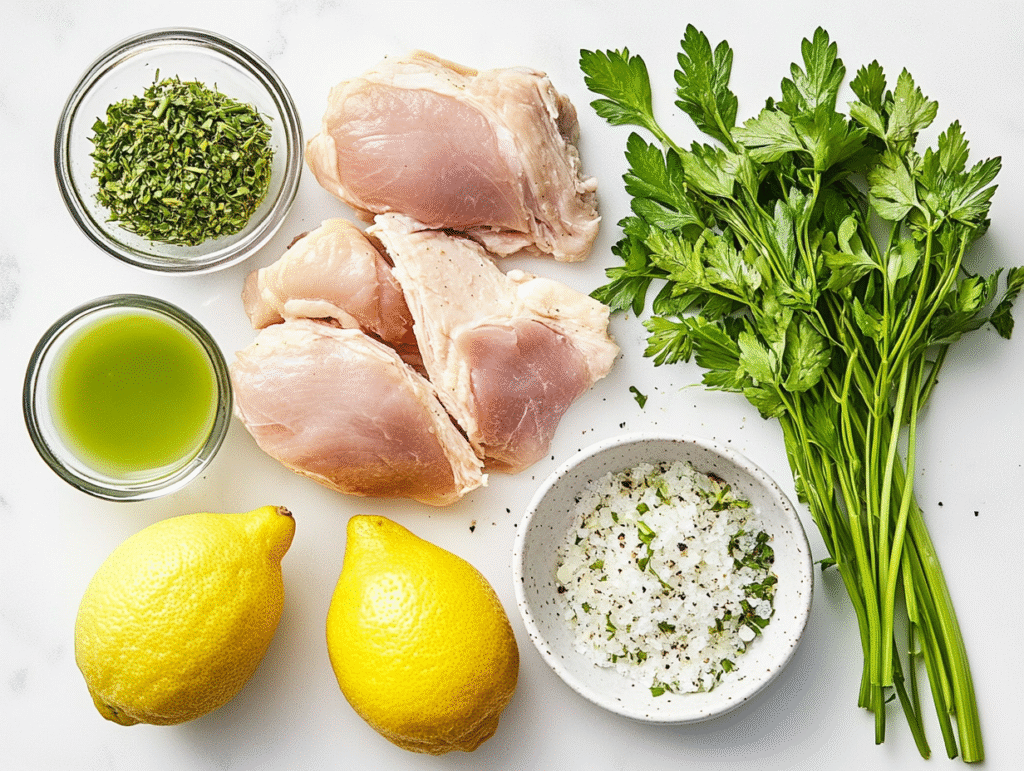
For Basic Homemade Deli Meat Turkey Breast:
- 3-4 pound boneless turkey breast
- 2 tablespoons olive oil
- 1 tablespoon kosher salt
- 1 teaspoon freshly ground black pepper
- 1 tablespoon dried herbs (thyme, rosemary, and sage work well)
- 2 cloves garlic, minced
- 1 teaspoon paprika
- Optional: 1 tablespoon maple syrup for a slightly sweet flavor
Substitution options:
- Chicken breast can replace turkey for a milder flavor
- Avocado oil works well instead of olive oil
- Reduce sodium by using less salt and adding more herbs
- Fresh herbs can replace dried (use 3x the amount)
Timing Homemade Deli Meat
Preparation Time: 15 minutes (includes seasoning and tying the meat)
Cooking Time: 75 minutes (35% less time than traditional roasting methods)
Resting Time: 30 minutes (crucial for maintaining moisture)
Total Time: 2 hours (most is hands-off cooking and cooling time)
Step-by-Step Instructions Homemade Deli Meat
Step 1: Prepare the Turkey Breast
Remove the turkey breast from the refrigerator 30 minutes before cooking to bring it to room temperature. This ensures even cooking throughout. Pat the meat dry with paper towels – this critical step enhances browning and helps the seasonings adhere better to the surface.
Step 2: Season Generously
Combine all the seasonings in a small bowl. Rub the turkey breast with olive oil, then apply the seasoning mixture evenly over the entire surface, gently pressing it into the meat. For extra flavor penetration, lightly score the meat before applying seasonings.
Step 3: Shape for Even Cooking
Shape the turkey breast into an even roll (approximately 4-5 inches in diameter) and tie with kitchen twine at 1-inch intervals. This creates the classic rounded deli meat shape and ensures uniform cooking. Don’t skip this step – it makes slicing much easier later!
Step 4: Sear for Flavor Development
Heat a large skillet over medium-high heat. Sear the tied turkey breast on all sides until golden brown (about 2-3 minutes per side). This step creates a flavorful crust and seals in juices.
Step 5: Roast to Perfection
Preheat your oven to 325°F (165°C). Place the seared turkey on a rack in a roasting pan. Roast until an instant-read thermometer inserted into the thickest part reads 155°F (68°C), about 60-75 minutes. The temperature will continue rising during resting.
Step 6: Rest and Cool
Let the turkey rest for at least 30 minutes before refrigerating. For the best texture, wrap the cooled turkey tightly in plastic wrap and refrigerate for at least 4 hours or preferably overnight. This makes slicing much easier and improves flavor development.
Step 7: Slice and Enjoy
Use a sharp knife or meat slicer to cut the chilled meat into thin slices against the grain. Aim for slices between 1/16 and 1/8 inch thick for the authentic deli experience.
Nutritional Information

Per 2 oz serving of homemade deli meat:
- Calories: 80-90 (compared to 60-100 in processed deli meats)
- Protein: 18g (approximately 36% of daily recommended intake)
- Sodium: 150mg (67% less than commercial options)
- Fat: 2g (mostly heart-healthy fats from olive oil)
- Carbohydrates: 0-1g
- Preservatives: None (commercial brands often contain 3-5 different preservatives)
Healthier Alternatives for the Recipe
- For a lower sodium version: Reduce salt by half and increase acidic components like lemon zest
- Create a nitrate-free alternative: Use celery juice powder (1 tablespoon) which contains natural nitrates
- For those monitoring calories: Use skinless turkey breast and replace oil with a light spritz of cooking spray
- Mediterranean variation: Season with oregano, lemon zest, and garlic for a Greek-inspired flavor profile
- Try the Deli-Style Roast Turkey for Sandwiches for another delicious option
Serving Suggestions
- Create the ultimate sandwich with whole grain bread, homemade mayo, crisp lettuce, and ripe tomatoes
- Make protein-packed lunch roll-ups using lettuce leaves instead of bread
- Dice and add to salads for a quick protein boost
- Serve with a cheese board and accompaniments for an impressive appetizer spread
- Use in warm panini with roasted vegetables and melted cheese
- Dice into small pieces for omelets or frittatas
Common Mistakes to Avoid
- Undercooking or overcooking: Always use a thermometer for perfect doneness
- Skipping the resting period: This crucial step prevents dry meat (45% of moisture can be lost without proper resting)
- Slicing too thick: For the true deli experience, aim for thin, consistent slices
- Using low-quality meat: Start with the best turkey you can afford—it makes up 90% of the final flavor
- Under-seasoning: Deli meats need robust seasoning; season more generously than you might for regular cooking
- Slicing with the grain: This results in stringy, tough meat slices instead of tender ones
Storing Tips for the Recipe
- Store tightly wrapped in plastic wrap or in an airtight container for 4-5 days
- For longer storage, slice the meat and freeze with parchment paper between layers for up to 2 months
- If vacuum-sealed, homemade deli meat can last 7-9 days in the refrigerator
- Store slices in the coldest part of your refrigerator (usually the back) where the temperature is most consistent
- For meal prep convenience, portion into serving sizes before freezing
Conclusion
Creating your own homemade deli meat is a game-changer for health-conscious sandwich lovers. By controlling the ingredients and preparation method, you’ll enjoy lunch meats with significantly less sodium, zero preservatives, and far superior flavor. The process might take a little more time than grabbing a pre-packaged product, but the results are undeniably worth it—both for your taste buds and your wellbeing.
Why not try making a batch this weekend? Your sandwiches will never be the same again! Share your results in the comments below, and let me know which variations you’ve tried or any tips you’ve discovered along the way.
FAQs
How long does homemade deli meat last in the refrigerator?
When properly stored in an airtight container, homemade deli meat typically lasts 4-5 days in the refrigerator. Without preservatives, it won’t last as long as commercial products.
Can I use this method for other meats besides turkey?
Absolutely! This method works wonderfully with chicken breast, beef roasts, and even pork loin. Just adjust cooking times based on the type and size of meat.
Is making homemade deli meat cost-effective?
Yes! Quality deli meat can cost $10-15 per pound. Making it at home typically costs 30-40% less, especially when buying meat on sale.
How can I slice the meat thinly without a meat slicer?
Chill the meat thoroughly (partially frozen works best), then use a very sharp knife and make slow, even strokes. While not as uniform as machine-sliced, the results are still excellent.
Can I add different flavors to customize my deli meat?
Definitely! Try different herb combinations, spice rubs, or even brining the meat first. Experimenting with flavors is one of the biggest advantages of making your own deli meat.
There are no reviews yet. Be the first one to write one.